You've heard me say it takes forever and all of my spirit to knit, but why? Our recent typography knits require a lot of extra effort to craft those special intarsia panels and today, I’m taking you through the process. (I’m also finally explaining what the heck intarsia is.)
1. Thumbnails
Quick little drawings in my sketchbook. This is where I start every project. Even if I already have a design in mind, I don’t let myself skip this step. It helps me flush many ideas off the bat and discover new ones along the way. Usually after I see a rough visual of an idea, I can decide whether or not it’s worth exploring further. The thumbnails with the most potential move on to the next step… to the computer!
2. And More thumbnails
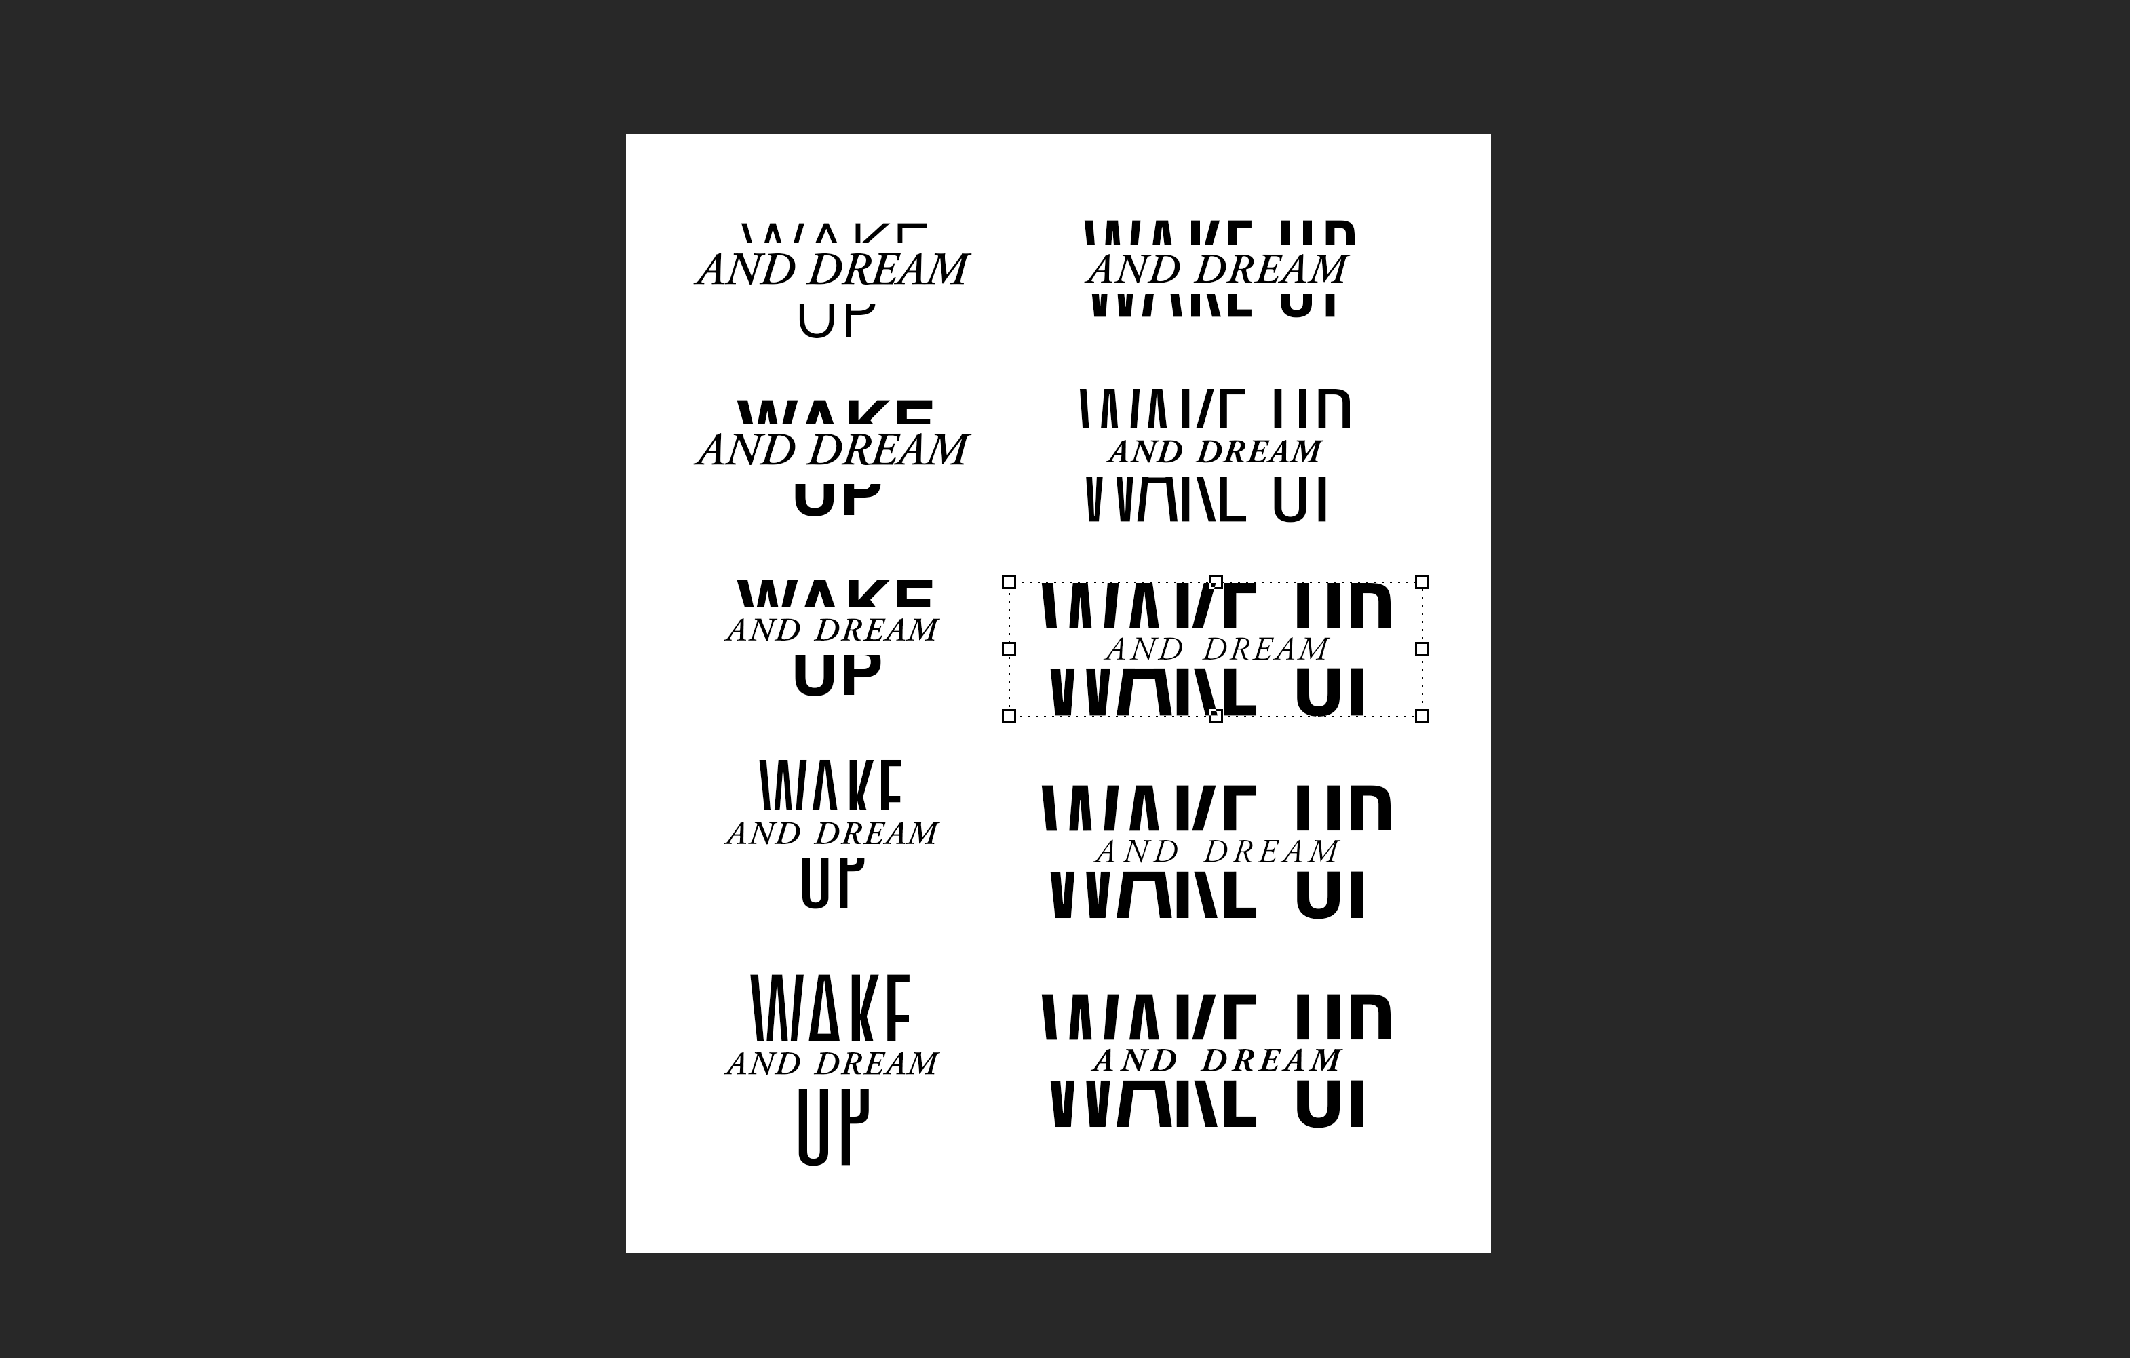
That’s right. Ya girl makes more thumbnails. I bring those initial concepts into Photoshop and expand on them with different typefaces, text weights, letter spacing, etc. My goal here is to find the most clear and compelling way to layout the text. So trying a lot of options with slight variations is how I figure that out for myself.
After I’ve scrapped the bottom of the barrel, I go through and select the final design that I want to move forward with. If I’m feeling torn between a few, I’ll take a step back and look at the choices later with fresh eyes. From here, my creative process becomes very labor and time intensive, so it’s well worth taking the extra time to mull over my options. I want to feel confident in my final choice.
3. Translating into the Knit Stitch
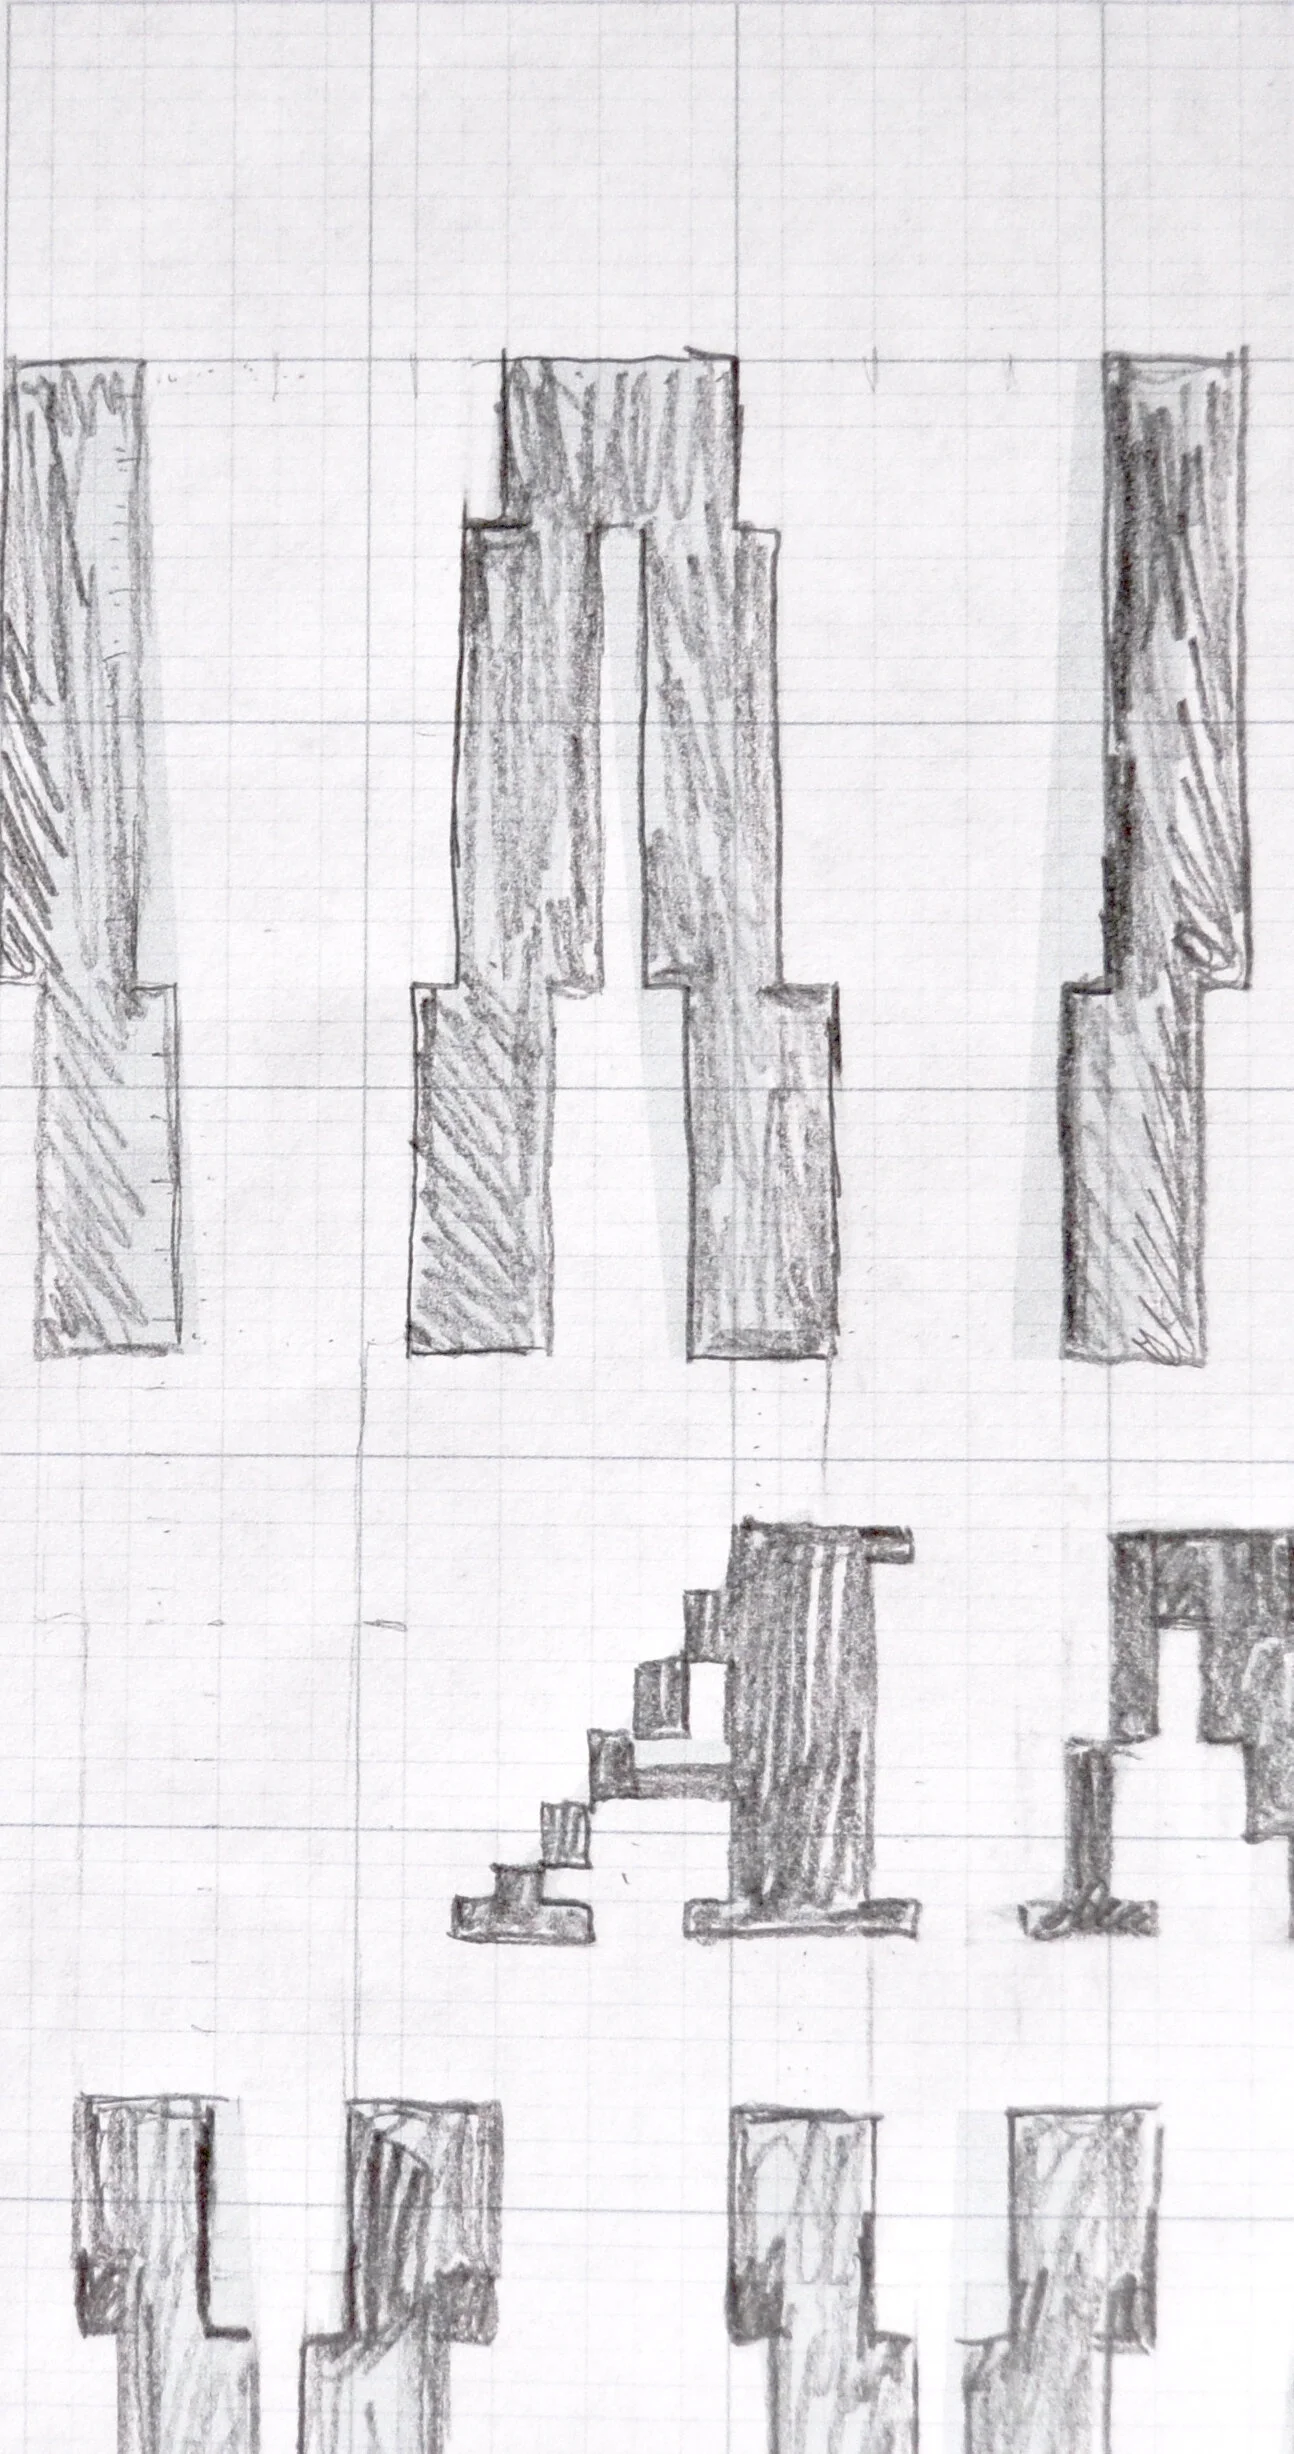
Once I’ve selected the final design, I overlay it on a grid that’s been scaled to match the panel I’ll be knitting. (Each little square represents a stitch.) I adjust the design as needed to better fit it in the space, reduce it’s transparency and then print it all out. With a pencil, I translate the smooth lines of the original type into the grid of the knit fabric.
This step can take a lot of back and forth as I work through the layout. Just because the design looks good in Photoshop doesn’t mean it’ll translate well onto the grid. Usually, I have to make adjustments to letter spacing and text widths to create a final design that’s cohesive and beautifully laid out on the knit fabric. For example (see above), I made the typeface of “and dream” much bolder than the original to better suit the final design.
4. Flip it
After the design is translated into the knit stitch, it’s time to flip that bb like a pancake. This is a very important step because when I’m knitting on the machine, I actually work on the backside of the fabric (the purl side). So the text needs to be mirror image in order for me to knit it correctly. Forgetting to do so, which has happened to me once before, means knitting the design backwards. It’s v devastating, and no one has time for that noise.
This step can be accomplished on the computer, but I prefer do it by hand with a sharpie. Althought it’s slower, redrawing the design helps me become familiar with the repeating slopes and increments of the pattern. This is super useful when I actually start knitting, and helps speeds things up. The more I’m acquainted with the design going into it, the better.
5. Now we’re ready to knit
Yes girl! After 2-3 days preparation, the knitting can finally begin! Following the pattern that I just painstakingly created, I knit the design one row at a time, carefully crafting each letter as I go. This technique is called intarsia.
In regular knitting, the carriage feeds yarn through the needles and into the knit fabric as it’s pushed across the machine. This is how I knit most Declarative pieces. In intarsia, however, the process is even more manual. Yarn is laid across the needles by hand, accounting for any color changes along the way. Note that each color change requires a new spool of yarn, so it’s also necessary to keep everything untangled while working. Once everything is prepped, an intarsia carriage is pushed across the machine to knit those stitches. That’s one row.
Intarsia is incredible because it allows me to create these very intricate and large designs. I honestly couldn’t do it any other way. But it’s drawback (which I’m sure has hit home) is that it’s very slow, tedious and draining. Not only am I limited to knitting one row at a time, but each row requires me to literally count out stitches. Counting stitches and double checking my work is the only way to actually knit the design as planned. Yah, it’s a journey.
This “Wake Up and Dream” pattern takes 4-5 hours of perfect knitting, meaning no mistakes along the way. Because this is such a manual process, the risk of making a mistake much higher than the typical Declarative textile. Making a mistake is also a much more significant setback. So these typography knits are a “slow and steady wins the race” type of situation. Patiently and step-bystep (with ample breaks along the way), I knit the words into fabric.
6. Still not done
Yasss queen! It’s been 4-5 hours, the intarsia panel is knit and we made it through! Well, some news though… We aren’t done yet. Right now, there are a bunch of yarn ends dangling from the back of fabric. So to finish up, I need to secure and sewn in those yarn ends and trim the excess. This gives the purl side a tidy, clean look. Below, I’m in the middle of this process. The top half of “UP” is tidy and the bottom still has yarn ends waiting to be sewn in.
6. And Now…
Yasss queen! We’ve made it! We’re done… with the front of the sweater. This might seem a little disappointing but honestly, it’s not that bad at all. In comparison to the intarsia panel we just finished up, knitting the rest of the garment is very much the victory lap. Completing the rest of the sweater panels, hemming them and seaming everything together takes an additional 6 hours, but because there’s a lot of variation in those tasks, it feels like a walk in the park.
Taking 25 spools of yarn and about 10 hours to knit, this is one of the most complex pieces I’ve ever created, but she was worth the effort! If this project is a testament to anything, it’s that you don’t know if you can do something until you try. So don’t wait another moment. Whatever idea you’ve been kicking around in your mind, try it queen. Wake up and dream! <3


